Lab 7: Do What I Say
Goal: Explore how we can use LLMs and speech recognition to control Pupper to do a variety of tasks! Benchmark this method against using a pre-trained CNN or Resnet architecture for speech recognition.
For this lab, we are going to implement a speech recognition pipeline to command Pupper with voice/speech input. To do so, we will hone ROS implementation skills to add various capabilities to Pupper, which will also be helpful for your final project. If anything is not working as expected or you have any questions, please ask a TA.
Fill out the lab document as you complete this lab: Lab document
Step 1. Getting Started
In this lab, we will be using the microphone on Pupper to record your voice input. Plug in the microphone transmitter into the Raspberry Pi, as shown in the image below.
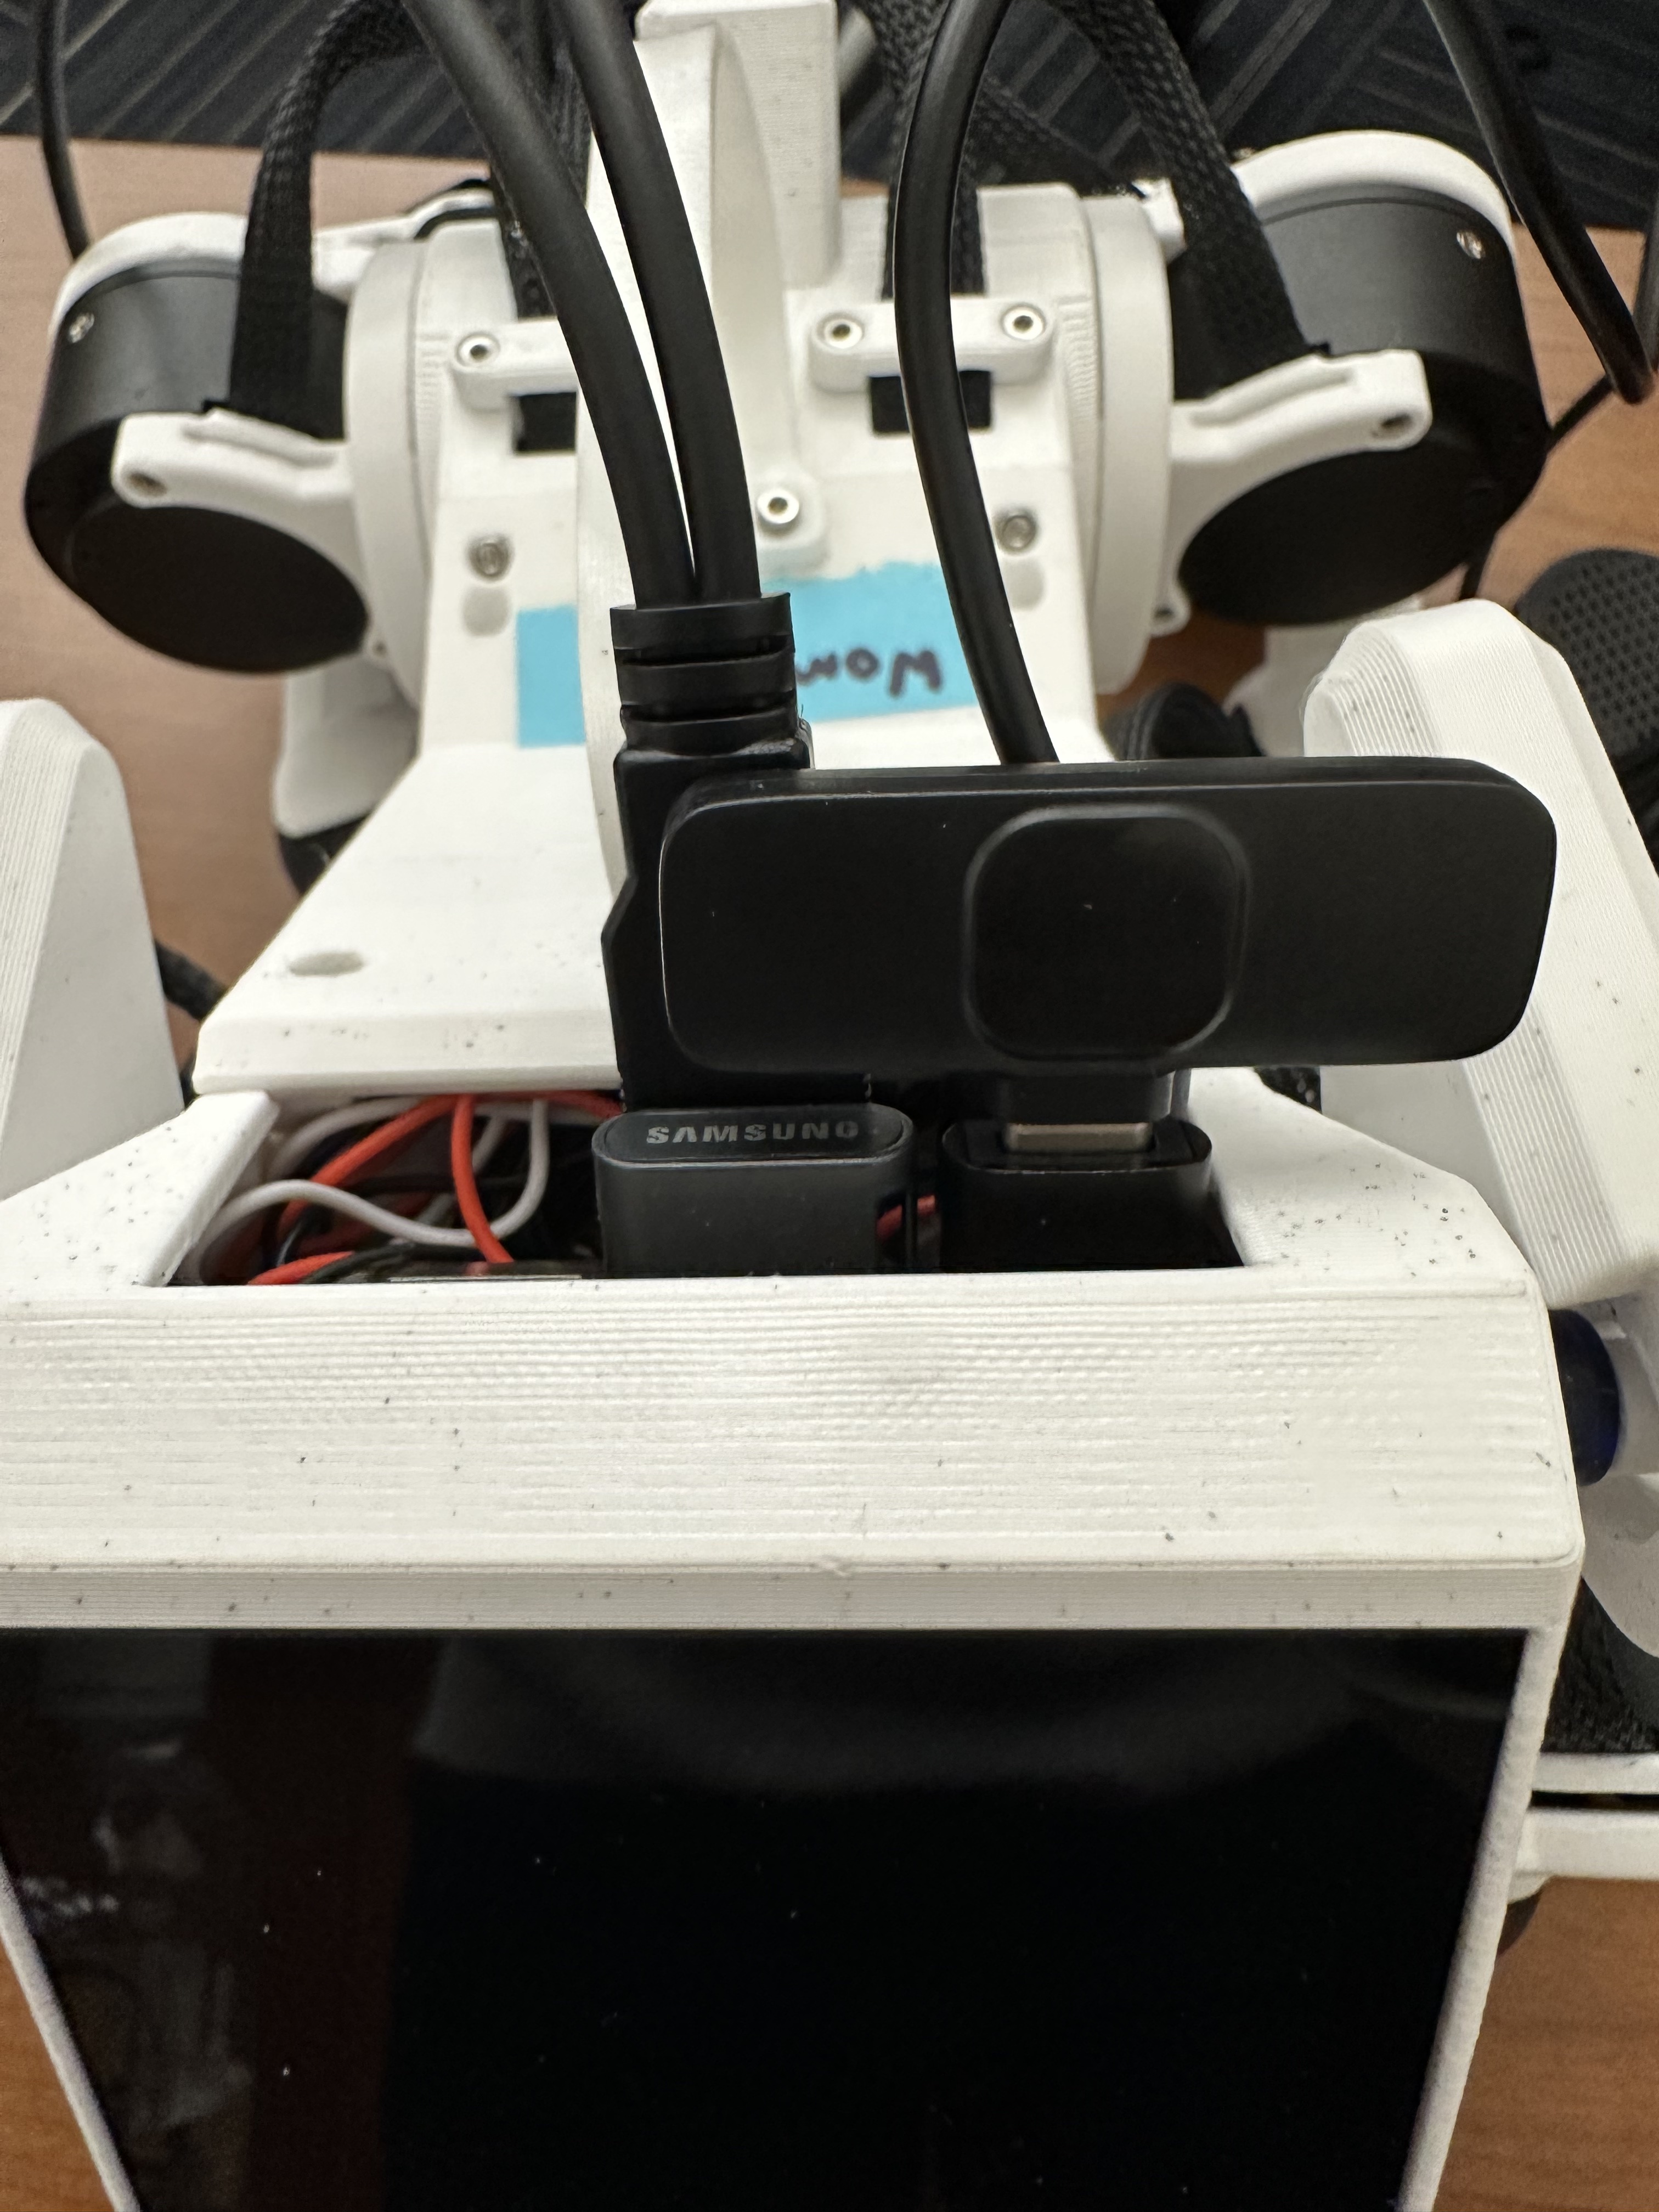
Microphone transmitter inserted into the Raspberry Pi.
Turn on the Pupper, and install the related python packages
pip install pygame
pip install simpleaudio
pip install openai
pip install openai-whisper
pip install sounddevice
pip install pyttsx3
Next, install the following package with a sudo apt install
sudo apt-get install espeak
Clone the starter code repository from GitHub into your Pupper’s home directory, using the exact name ‘pupper_llm’ to avoid errors:
cd ~/
git clone https://github.com/cs123-stanford/pupper_llm_student.git pupper_llm
Navigate to the folder ~/pupper_llm/pupper_llm/Robot_Commands/ and run the following command. If some dependencies are not working (which shouldn’t be a big issue), please let a TA know!
pip install -r requirements.txt
Step 2. Use the Karel Pupper API
For much of this lab, we will be using the KarelPupper API, which many of you remember “fondly” from CS106A’s Karel the Robot as a programming introduction. Trust me, this isn’t nearly that bad on Pupper ;). Much like in CS106A, we use the KarelPupper API to do basic commands to control Pupper. In our case, using this API abstracts away the minute motor control commands and makes code much more readable for something like an LLM. The following excercises will help you get familiar with the API, which is something that many students build on top of for their final projects.
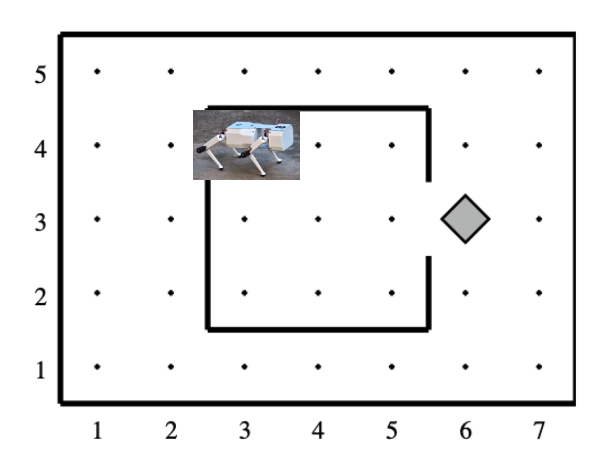
Pupper in the Karel Environment.
Experiment with the KarelPupper API by running the karel_test.py script. Take a look at the script, and see if you can understand what Pupper should do before you run the script, and then run the script to validate your thoughts. In a first terminal, run
cd ~/pupper_llm/launch
ros2 launch launch.py
- In a second terminal, run the commands
cd ~/pupper_llm/pupper_llm/karel
python3 karel_test.py
Use the KarelPupper API to control Pupper to do a new action in a new python file. Do this by chaining together many commands together, which you can see available in the karel.py file. If required, you can further tune the hardcoded numbers for moving Pupper in karel.py or implement your own high-level commands.
DELIVERABLE: Submit your new python file to control Pupper with the KarelPupper API to Gradescope. Write a short blurb about what you commanded Pupper to do. Write about any tuning or new command implementations you made. Take a video and upload to Gradescope with your submission.
Step 3. Create a Simple Chat with GPT Through the Command Line
Our first step to implement our speech recognition pipeline is to ROSify the ChatGPT API. While we all know we can chat with ChatGPT through the web app, we will need to be able to send the responses to ChatGPT through a series of ROS publishers and subscribers. Open VSCode, and find the simple_gpt_chat.py file at ~/pupper_llm/pupper_llm/simple_scripts/. This script will get responses from the ChatGPT API based on user queries.
Refer to the Canvas/Ed announcements for the OpenAI API key. Paste the key in line 6 in the TODO. This will allow you to ping the ChatGPT API.
Remember that a callback function in ROS is a function that gets automatically called when a specific event occurs, such as receiving a message on a topic, a service request, or a timer event. In Line 13, we create a subscriber self.subscription that runs the callback function query_callback everytime the /user_query_topic ROS topic receives a message. Implement the query_callback function according to the description in the file. Refer to the String Message documentation.
When we call the ChatGPT API, we need to pass in a default prompt. Tuning this prompt to use ChatGPT as a helpful assistant is a process called prompt engineering. Fill out the prompt variable with a Python string containing your prompt. In the following lines, this is used in the response variable to start your conversation with ChatGPT.
Open the file command_line_publisher at ~/pupper_llm/pupper_llm/Robot_Commands/. This script will be used to send queries to the ChatGPT API at the user_query_topic that the simple_gpt_chat.py script subscribes to.
Similarly to the Step 3, implement the publish_message method according to the description in the file.
Run your implementation. In a first terminal, run the commands
cd ~/pupper_llm/pupper_llm/simple_scripts
python3 simple_gpt_chat.py
In a second terminal, run the commands
cd ~/pupper_llm/pupper_llm/Robot_Commands
python3 command_line_publisher.py
DELIVERABLE: Experiment with different prompts. Engineer a prompt that you can use to control Pupper at a high level. Include your prompt in the Lab Document.
You should now be able to send queries through the second terminal, and see responses from the ChatGPT API in the first terminal (with the debug statements in your implemented methods uncommented). Congrats! You have now just ROSified ChatGPT!
Step 4. Use the Whisper API to Send Voice Input to ChatGPT
The Whisper API is a state-of-the-art (questionable) automatic speech recognition (ASR) system. The Whisper API enables developers to integrate speech-to-text capabilities into their applications by sending audio files to the API and receiving a transcription of the spoken content. We will use Whisper to send voice commands to Pupper. In ~/pupper_llm/pupper_llm/simple_scripts, paste the OpenAI API key from the Canvas/Ed announcements to line 7.
Copy your implementation of publish_message in the file whisper_ping.py in the folder ~/pupper_llm/pupper_llm/simple_scripts. The rest of the code is implemented for you. The code essentially receives input from a USB microphone, parses it at regular intervals, and sends that to user_query_topic (just as command_line_publisher.py)
Plug in the USB speaker to the Pi. Check that your microphone transmitter has a constant green light indicating it’s working properly. If the light is not constant green, try turning the microphone off and on again.
Run your code. In a first terminal, run the commands
cd ~/pupper_llm/pupper_llm/simple_scripts
python3 simple_gpt_chat.py
In a second terminal, run the commands
cd ~/pupper_llm/pupper_llm/simple_scripts
python3 whisper_ping.py
You should now be able to speak into the microphone transmitter, and see the second terminal output the speech-to-text response from the Whisper API, and ChatGPT’s response in the first terminal.
DELIVERABLE Do you notice any latency problems with the Whisper API? Try to increase/decrease the dur variable in main.py to see the effect on latency. Report your findings in the lab document, and why you think your changes led to your empirical findings.
Step 5. Make ChatGPT command the KarelPupper API
Now we will use the previous scripts to command the KarelPupper API rather than just creating a chat stream. Open the file karel_chat_gpt_commander.py, at ~/pupper_llm/pupper_llm/karel, and paste in the API key from Canvas/Ed announcements in line 8.
Engineer a prompt to have ChatGPT output a KarelPupper command based on the input user query. Paste in the prompt in the prompt variable inthe get_gpt_response method.
Paste in your implementation of query_callback from simple_gpt_chat.py to the beginning of extended the query_callback function here. self.play_response script plays the response through the USB speaker. self.execute_robot_command uses the response from ChatGPT to execute commands to control Pupper with the KarelPupper API.
Implement the exectute_robot_command method. Based on the response argument, this method should control Pupper with the KarelPupper object self.pupper in a big if-else statement.
Run your code. In a first terminal, run the commands
cd ~/pupper_llm/launch
ros2 launch launch.py
In a second terminal, run the commands
cd ~/pupper_llm/pupper_llm/karel
python3 karel_chat_gpt_commander.py
Now, you can use either whisper_ping.py (using voice input) or command_line_publisher.py (using text input) to send natural language commands to Pupper. Run either one following the above directions. (So you will have three terminals running: one for the launch file, one for the KarelPupper GPT Node, and one for the voice/text input)
You should now be able to command Pupper to move based on user input!
DELIVERABLE Now that you have implemented the full voice command pipeline, comment on the shortcomings of using this method in a human-robot interaction environment. Do you have suggestions on how to improve these capabilities? (We are not looking for a very specific answer here, but are more so looking for general takeaways from what you have experienced when using this pipeline, and how it can be improved on)
DELIVERABLE As an extension of this method, use these code examples to implement a pipeline where ChatGPT can make Pupper do more complex actions by chaining together multiple KarelPupper API Commands. Create a new script based on karel_chat_gpt_commander.py that performs this capability (you will likely need to modify the prompt to do this among how you process the commands). Comment about how you did this.
DELIVERABLE: As you have probably noticed, the whisper_ping.py script runs once, and then you have to run it again entirely to run new voice input. We can modify this script in the main loop to run a continuous loop, by adding a while loop conditioned on rclpy.ok(). While starting the loop seems simple, this causes some latency issues where the publisher and subscriber may not necessarily be aligned where inputs may be played more than once or not at all. Make this run in a continuous loop and improve the latency for this implementation. Record a video with your submission.
EXTRA CREDIT: When using this method, we make API calls to OpenAI’s Whisper and GPT models. While the inference time to get a response from GPT/Whisper is fast, we are often limited by the latency in the network for sending the data through the API. An alternate method for this pipeline is to use on-board models for voice input parsing. Since the Pi has limited compute, we will need to use much smaller models than the potent GPT-4o models we used in the lab today. However, the Pi can support many smaller models. Experiment with creating the same pipeline by using an on-board speech-to-text engine and on-board text understander (you may choose to use a smaller LLM, or an alternate method entirely. Make sure to confirm your pipeline with a TA prior to trying to avoid damage to the Pi). Attach your code with your submission and write a few sentences about what you did (3-4 sentences, <1 paragraph).
Step 6. Benchmark Against CNN and ResNet Method
As an alternate method to using LLMs to control Pupper, we can also control Pupper using neural networks that recognize audio keywords, which offer a lighter-weight solution. We have implemented this for you, but would like you to benchmark this method against your implementation to understand the benefits and drawbacks of using LLMs for robotic control. If you are curious about how this was done, refer to the Robot Commands and Keyword Spotting, or ask a TA.
Open the files inference_publisher at ~/pupper_llm/pupper_llm/Robot_Commands and karel_cnn_commander.py. This approach essentially used a pretrained CNN or ResNet neural network spot keywords in a stream of audio, which are then used to command Pupper. Inference is run real-time using the pre-trained model. Inspect these files.
DELIVERABLE From inspection, do you notice any drawbacks of using this method? Report on what they could be.
Run the CNN Method. In a first terminal, run the commands
cd ~/pupper_llm/launch
ros2 launch launch.py
In a second terminal, run the commands
cd ~/pupper_llm/pupper_llm/karel
python3 karel_cnn_commander.py
In a third terminal, run the commands
cd ~/pupper_llm/pupper_llm/Robot_Commands
python3 inference_publisher.py
When the inference_publisher script asks for input, select either the CNN or the ResNet option. If you are prompted with the option to select an audio device, select the option corresponding to the UAC microphone.
DELIVERABLE Command Pupper using this method. What are the drawbacks and benefits as compared to the method using LLMs? What do you think these drawbacks and benefits are caused by?
Congrats! You have now implemented voice control on Pupper and benchmarked two different methods. Feel free to build upon this for your final project (we provide optional lab 3 to help you get started)!