Lab 5: How to Train Your Dog
Goal: Use RL to control your Pupper.
Step 1.Stand High Policy
Reward is standing high. Provide code with standing at regular height, student need to modify it to make it stand higher.
Deploy on real
DELIVERABLE: Screen recording of stand up in simulation
Step 2. Deploy Stand High Policy
Transfer policy from local machine to pupper #. The model is a .pt file under the log folder name (e.g., “model_700.pt”) #. ‘scp [model name] pi@raspberrypi.local:’ (note the colon at the end)
In local puppersim repo, change the policy called in isaac_gym_policy.py (located under the puppersim folder) to your policy name (your .pt file)
Change pi address in deploy_to_robot.sh
./deploy_to_robot.sh python puppersim/puppersim/isaac_gym_policy.py –run_on_robot
DELIVERABLE: Take video of stand-up
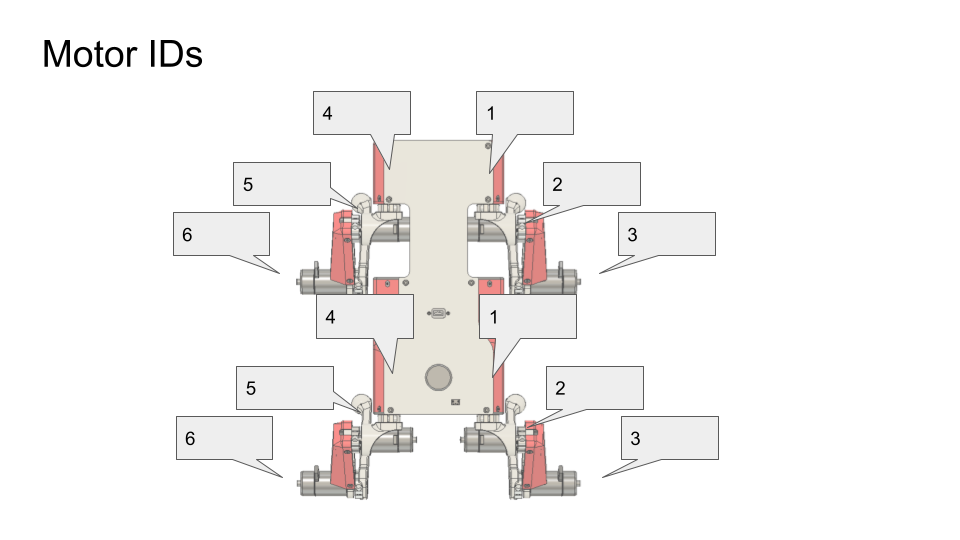
Motor ID diagram
Step 3. Walking Policy
We provide basic interface (how to read robot velocity, how to obtain target velocity) and student need to write a new reward function
deploy in sim
DELIVERABLE: What terms are included in your reward functions? What coefficeints did you use? How did you come up with these terms and what was their desired effect? Why might this policy perform poorly on the physical robot?
Step 4. Domain Randomization
Student need to implement domain randomization
Deploy on real, works
DELIVERABLE: What other terms could you randomize?
Startup position.
Step 5. Speed/terrain test
Screw RPi into electronics bulkhead with M2.5x5 socket head screws such that the Pi is oriented like in the video.
Connect USB C extension cable to Rpi
Connect RPi camera flex cable into RPi. There’s a little grey flap that flips up on the connector that lets you slide the cable in. Flip the flap down to lock the cable in.
Connect RPi to power by using 2-pin cable. Connect one end into 5V, GND pins near the Teensy and other side into RPi. Quadruple-check that the 5V and GND pins are going the right places. See diagram.
Connect RPi to Teensy using USB A to USB micro cable
Connect RC receiver to RPi with usb extension cable.
DELIVERABLE: Test your policy during office hours
Resources
Wiring diagram
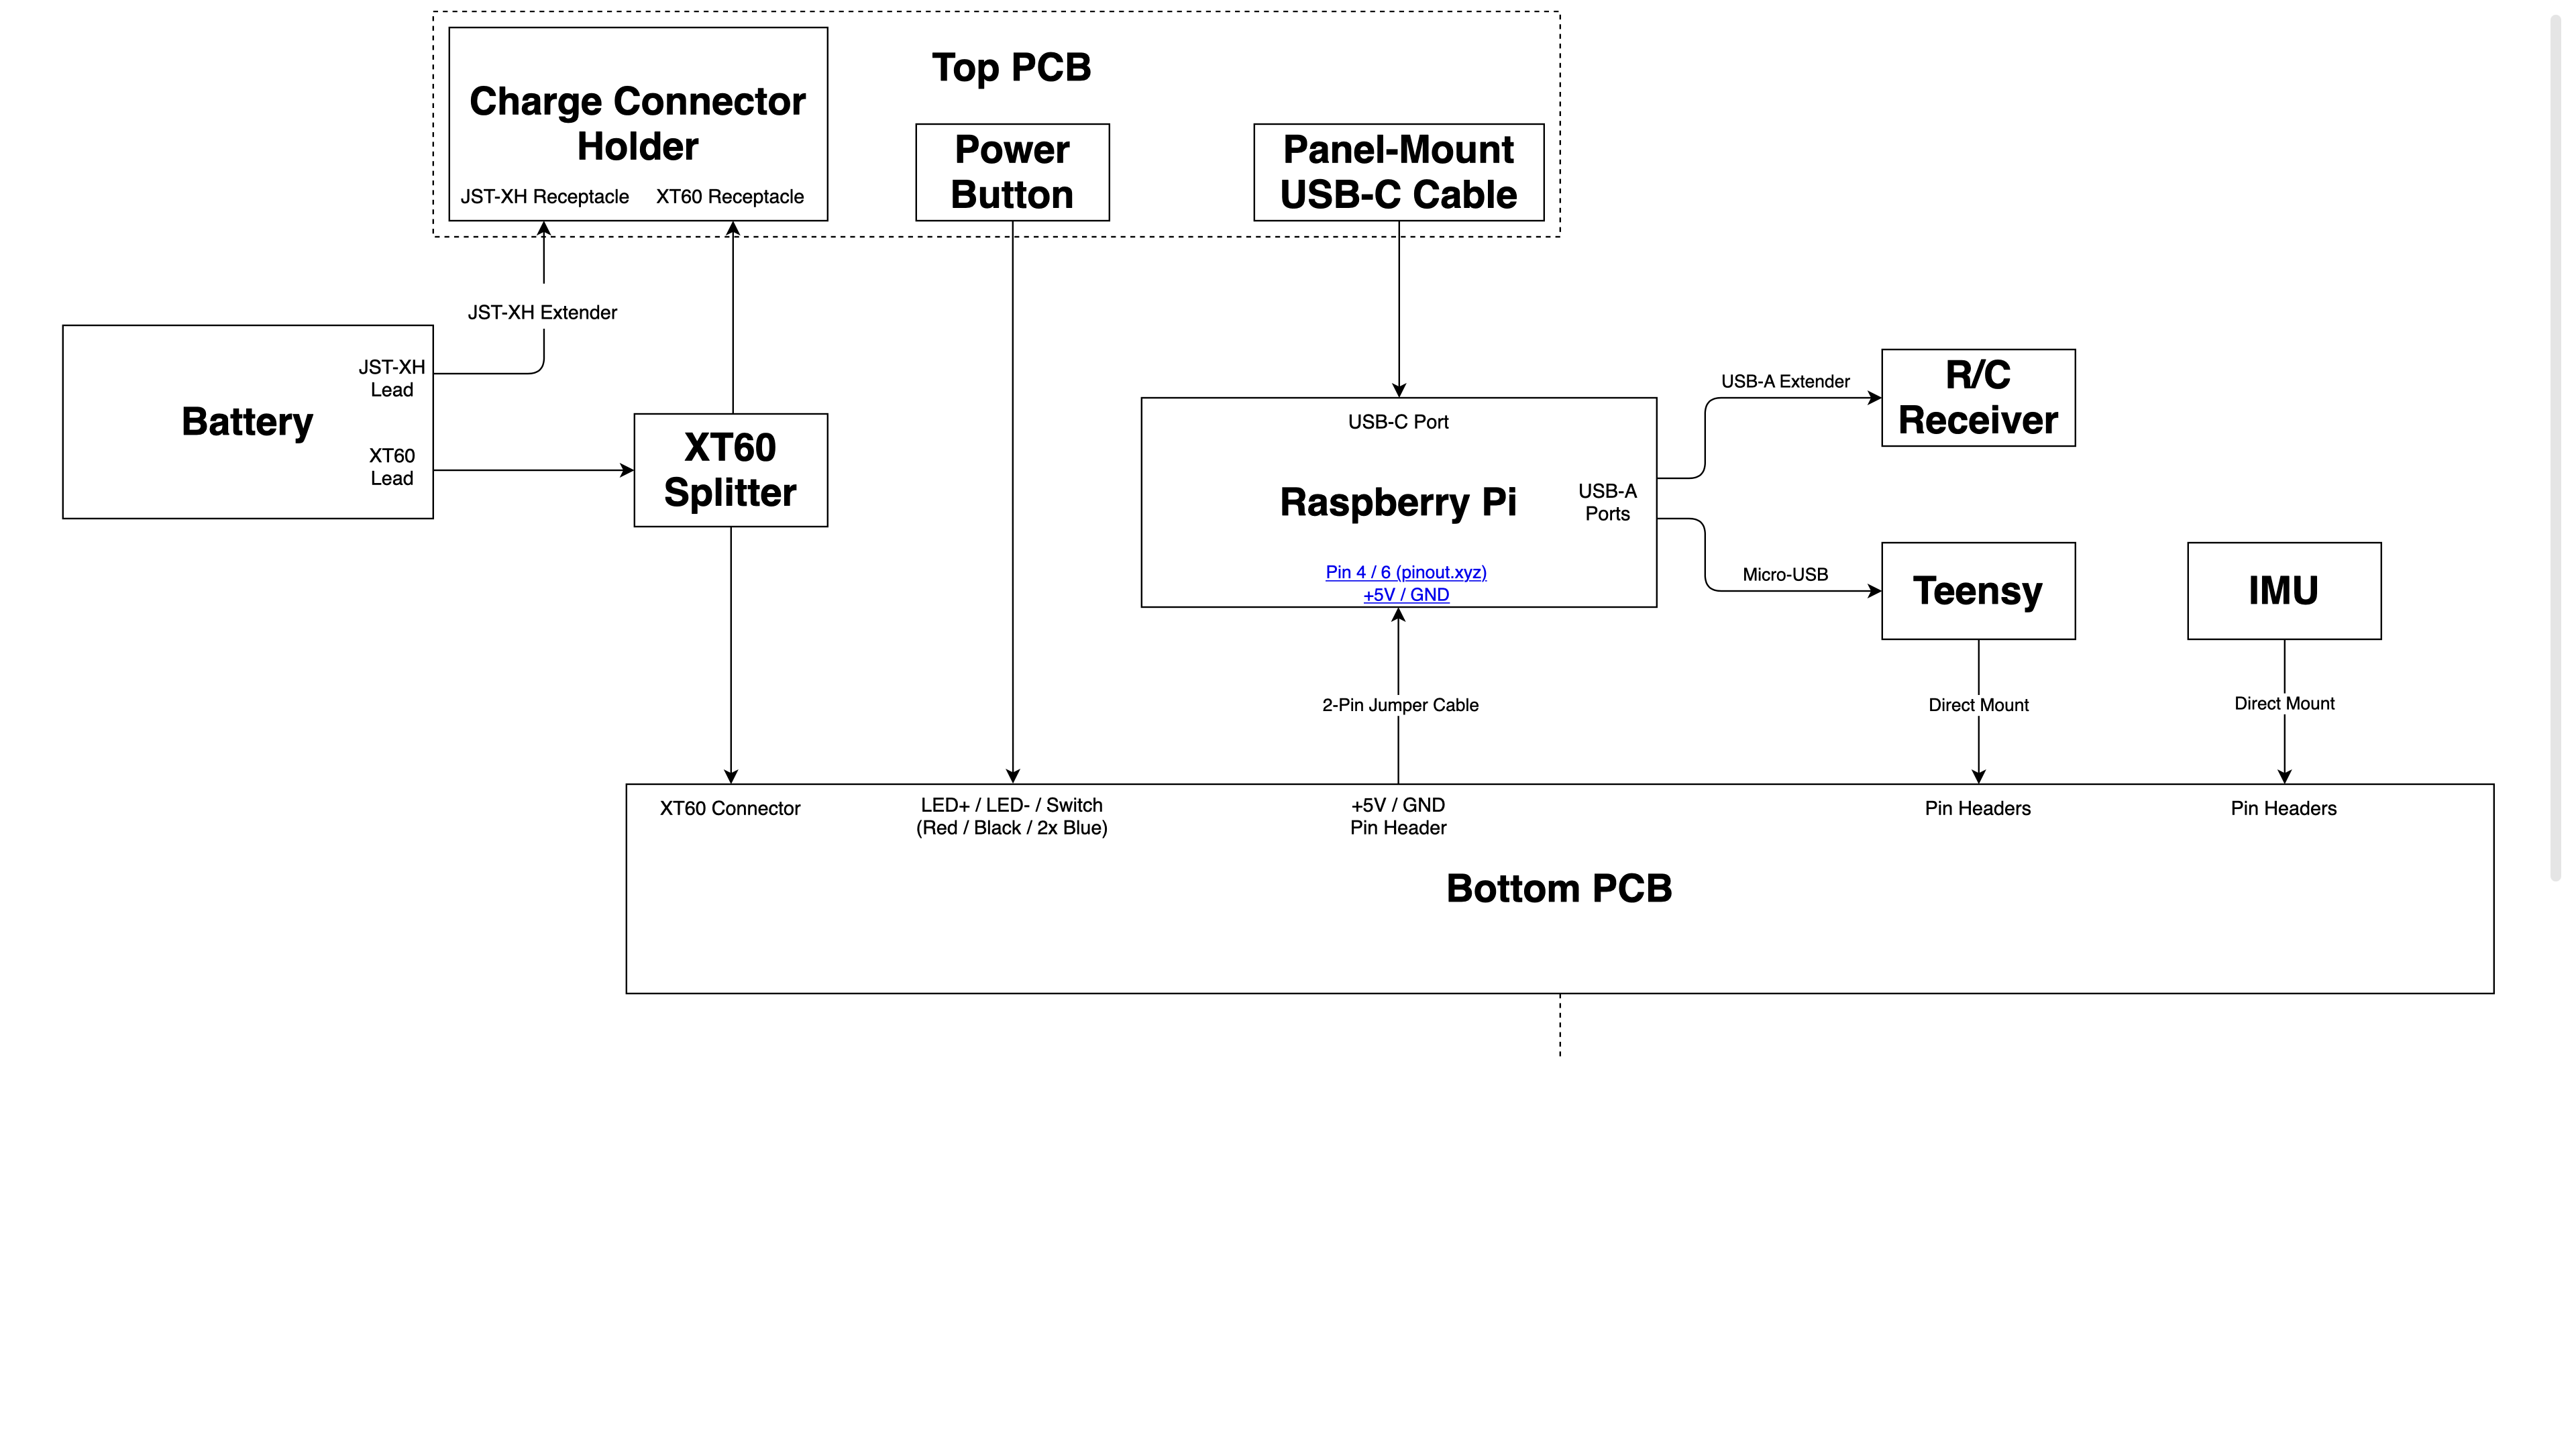
Wiring diagram.